Incline Pushups: Perfect for Beginners
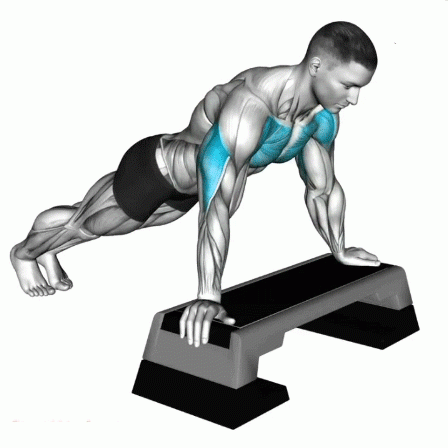
Incline pushups are an excellent exercise for beginners and anyone looking to build upper body strength safely. By performing pushups on an elevated surface, you reduce the load on your chest, shoulders, and arms while still engaging the core and lower body. This makes incline pushups ideal for building strength and improving pushup technique before progressing to standard or decline pushups.
Instructions
Set Up Your Incline
-
Use a sturdy elevated surface such as a bench, table, or low wall.
-
The higher the incline, the easier the push-up. Adjust the height based on your current fitness level.
Foot Placement
-
Stand straight with your feet hip-width apart before leaning forward to grip the incline.
-
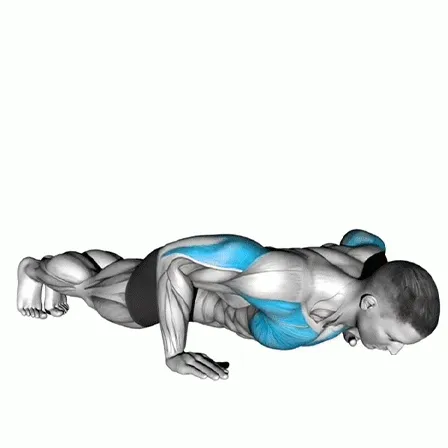
Extend your legs straight back so that your body forms a straight line from your heels to your head.
-
Ensure your toes are firmly planted on the ground for stability.
Engage Your Legs
-
Tighten your quads and glutes to maintain a stable lower body.
-
Avoid letting your knees bend or your hips sag; keep your legs fully extended.
Perform the Push-Up
-
Lower your chest toward the incline by bending your elbows at a controlled pace.
-
Keep your legs engaged and straight throughout the movement.
-
Push back up to the starting position.
Tips for Proper Form
-
Core and Leg Engagement: Activate your core and squeeze your glutes to stabilize your lower body. This reduces strain on the lower back and ensures smooth, controlled movement.
-
Avoid Leg Flaring: Keep your legs aligned with your torso. Avoid letting them splay outward, which can destabilize the exercise.
-
Add Variety: For increased difficulty, try crossing one ankle over the other to challenge your balance and engage your core further.
-
Footwear Matters: Wear shoes with good grip to prevent slipping during the exercise.
-
Stretch Before and After: Perform light stretches for your hamstrings, calves, and hip flexors before and after your workout to ensure flexibility and reduce stiffness.
Benefits of Incline Pushups
-
Builds upper body strength with reduced stress on joints.
-
Engages the chest, shoulders, and triceps effectively.
-
Strengthens the core and lower body for better stability.
-
Ideal for beginners or anyone rehabbing from injury.
-
Helps improve pushup technique before progressing to standard pushups.
-
Can be performed anywhere with minimal equipment.
Conclusion: Incline pushups are a safe and effective way for beginners to build strength, improve form, and prepare for more advanced pushup variations. Consistent practice enhances upper body strength, core stability, and overall endurance.
