Barbell Rack Pull: Maximize Deadlift Strength
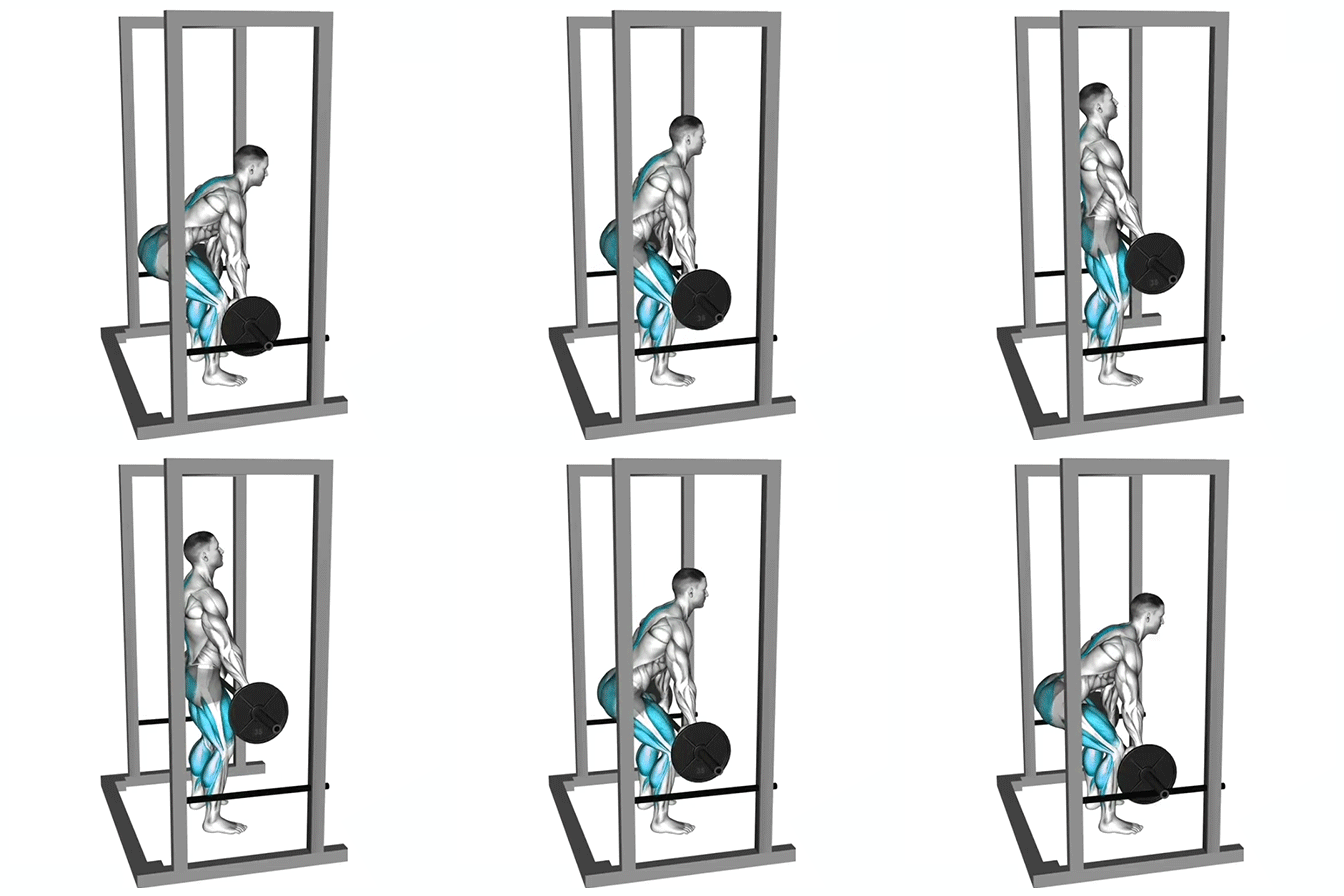
The barbell rack pull is a powerful deadlift variation designed to improve lockout strength, build posterior chain muscles, and increase overall pulling power. By shortening the range of motion, this exercise allows lifters to overload the movement with heavier weights while reinforcing proper deadlift mechanics.
Instructions
Setup
-
Position the bar on safety pins inside a power rack at just below knee height.
-
Stand with your feet hip-width apart, close to the bar.
-
Push your hips back and hinge forward.
-
Grasp the bar with a firm overhand or mixed grip, hands just outside shoulder-width.
Engagement & Starting Position
-
Pull slightly upward on the bar while dropping your hips to “pull the slack out of the bar.”
-
Set your lats tight by imagining you are squeezing oranges in your armpits.
-
Keep your chest up so the armpits remain directly over the bar.
-
Maintain three points of contact with the floor (big toe, little toe, heel).
Execution
-
Drive the Pull
-
Push through the whole foot as you extend your hips and knees.
-
Keep the bar close, tracking in a straight, vertical line.
-
-
Lockout
-
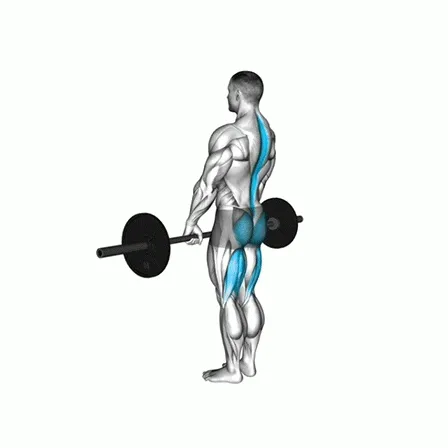
Stand tall at the top, hips locked out, chest up.
-
Avoid leaning back excessively.
-
-
Return
-
Push your hips back and hinge forward to lower the bar under control.
-
Reset and repeat for the desired reps.
-
Key Cues & Technique Notes
-
Stance Width: Mimic your natural jumping stance to maximize power.
-
Lat Engagement: Keep the bar close by squeezing your lats—use cues like “shoulder blades in your back pockets.”
-
Knee Tracking: Drive your knees outward so they align over the feet.
-
Neck Position: Choose between neutral chin tuck or slightly looking up, depending on your anatomy and comfort.
-
Grip: Always wrap your thumb around the bar and squeeze tightly—avoid false grips.
-
Shoulders: Do not retract your shoulder blades; keep them depressed to maximize pulling efficiency.
-
Elbows: Keep them locked to reduce biceps strain.
Common Mistakes to Avoid
-
Letting the bar drift away from the body.
-
Overextending at lockout.
-
Placing all weight on the heels instead of evenly through the foot.
-
Using momentum instead of controlled lifting.
-
Allowing the elbows to bend during the pull.
Programming Notes
-
For single heavy reps, dropping the bar after lockout can reduce spinal fatigue (if your gym allows).
-
For multiple reps, lower the bar under control to preserve energy without overstraining the erectors.
-
If you’re weak at lockout → add rack pulls, Romanian deadlifts, or band/chain pulls.
-
If you’re weak off the floor → incorporate paused or deficit deadlifts, plus accessory work for glutes and upper back.
Benefits of Barbell Rack Pulls
-
Builds maximum pulling strength in the deadlift.
-
Overloads the posterior chain (glutes, hamstrings, spinal erectors).
-
Strengthens grip and lat engagement.
-
Helps lifters overcome sticking points, especially at lockout.
-
Improves confidence with handling heavy weights.
-
Enhances overall power for athletes and strength lifters.
Conclusion: The barbell rack pull is an advanced accessory lift for building deadlift strength, size, and lockout power. Incorporate it strategically into your training to break plateaus, reinforce technique, and maximize performance in your conventional deadlift.
